Configuring Spring Boot’s Server, GZip Compression, HTTP/2 & Caching

Last Updated on August 27, 2026 by Triumphoid Team
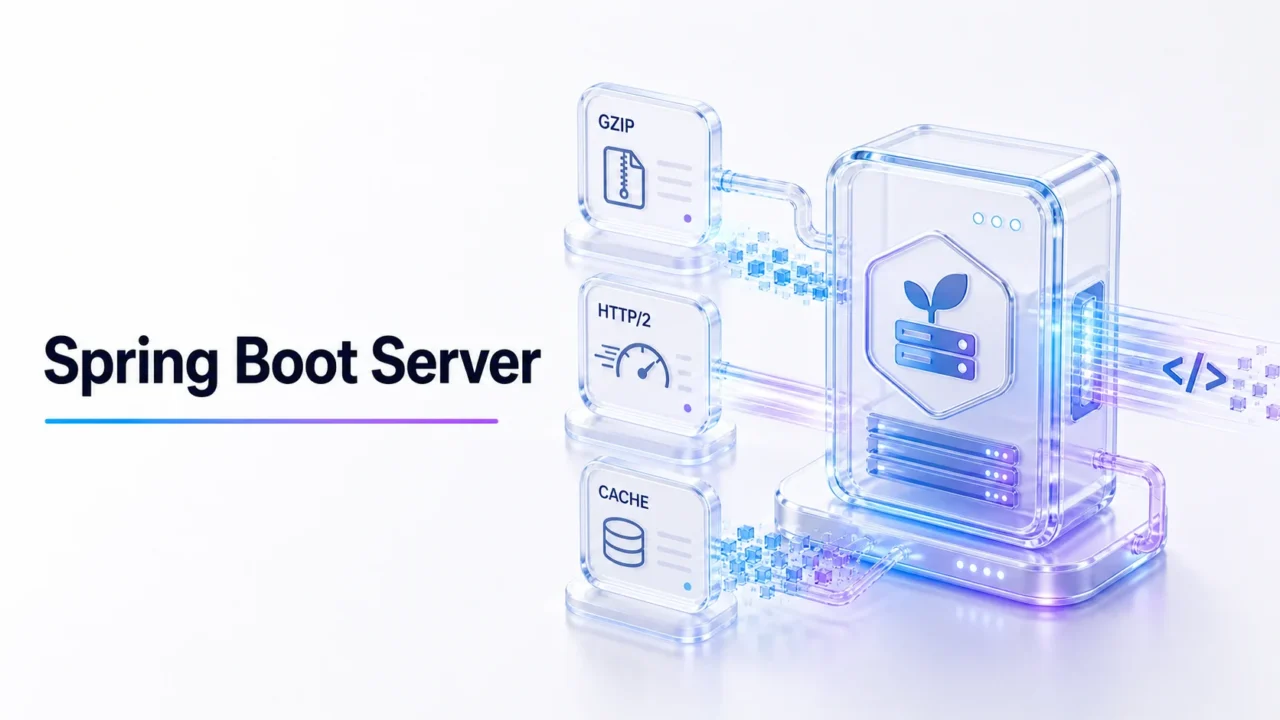
Spring Boot is powerful because it gives you sensible defaults while still exposing almost every important web-server setting through configuration.
For a simple application, you can start it and accept the defaults. In production, however, you will usually want to configure at least some combination of the server port, context path, HTTP compression, HTTP/2, TLS, caching, multipart upload limits, proxy headers, request limits and graceful shutdown.
This guide covers the Spring Boot server configuration settings that are most useful in real applications, with examples for modern Spring Boot 4.x and notes where Spring Boot 3.x behaves differently.
Version note: This article has been updated for modern Spring Boot, including Spring Boot 4.x. Some property names and supported embedded servers have changed since the original Spring Boot 2.x version of this tutorial.
Spring Boot’s embedded web server
A normal Spring Boot web application does not require you to install Tomcat separately. The web server is embedded in the application and starts together with your Spring Boot process.
For servlet-based Spring MVC applications, Tomcat is the usual default. Jetty is another supported option. Reactive Spring WebFlux applications normally use Reactor Netty.
This means a Spring Boot application can normally be packaged as an executable JAR and started with:
java -jar my-application.jarThe embedded server is created and configured automatically from your dependencies and Spring Boot configuration.
Changing the embedded server in Spring Boot
Spring Boot traditionally uses Tomcat as the default servlet container. If you prefer Jetty, you can exclude the Tomcat starter and include the Jetty starter instead.
Using Jetty as the embedded server
The classic Maven configuration looks like this:
<!-- Exclude tomcat dependency -->
<dependency>
	<groupId>org.springframework.boot</groupId>
	<artifactId>spring-boot-starter-web</artifactId>
	<exclusions>
		<exclusion>
			<groupId>org.springframework.boot</groupId>
			<artifactId>spring-boot-starter-tomcat</artifactId>
		</exclusion>
	</exclusions>
</dependency>
<!-- Include jetty dependency -->
<dependency>
	<groupId>org.springframework.boot</groupId>
	<artifactId>spring-boot-starter-jetty</artifactId>
</dependency>
In newer Spring Boot 4 projects you may also encounter spring-boot-starter-webmvc, which is the more explicit Spring MVC starter.
There is generally no reason to swap Tomcat simply because another server sounds faster. For most applications, application code, database access, external APIs, caching strategy and JVM behavior matter considerably more than the difference between mainstream servlet containers.
Using Undertow as the embedded server
The following configuration was commonly used with earlier Spring Boot releases:
<!-- Exclude tomcat dependency -->
<dependency>
    <groupId>org.springframework.boot</groupId>
    <artifactId>spring-boot-starter-web</artifactId>
    <exclusions>
        <exclusion>
            <groupId>org.springframework.boot</groupId>
            <artifactId>spring-boot-starter-tomcat</artifactId>
        </exclusion>
    </exclusions>
</dependency>
<!-- Include undertow dependency -->
<dependency>
    <groupId>org.springframework.boot</groupId>
    <artifactId>spring-boot-starter-undertow</artifactId>
</dependency>
Spring Boot 4 warning: Undertow is no longer one of Spring Boot 4’s supported embedded servlet containers. The example above remains relevant to applications running compatible Spring Boot 3.x releases, including Spring Boot 3.5. For a new Spring Boot 4 servlet application, use Tomcat or Jetty.
Changing the default server port
By default, a Spring Boot web application listens on port 8080.
You can change it in application.properties:
# HTTP Server port
server.port=8080
For example, to run the application on port 9090:
server.port=9090The YAML equivalent is:
server:
  port: 9090
You can also override a property at startup without modifying the packaged application:
java -jar myapp.jar --server.port=9090Or provide it through the corresponding environment variable:
SERVER_PORT=9090This is particularly useful in containers and deployment platforms where environment-specific configuration should not be baked into the JAR.
Changing the Spring Boot context path
By default, the application is served from the root context /.
To expose it under a path such as:
http://localhost:8080/myappconfigure:
# Make the application accessible on the given context path
server.servlet.context-path=/myapp
Combined with the port configuration:
# HTTP Server port
server.port=8080

# Make the application accessible on the given context path (http://localhost:8080/myapp)
server.servlet.context-path=/myapp
server.servlet.context-path applies to servlet applications. Spring WebFlux applications use their WebFlux-specific base-path configuration instead.
Binding Spring Boot to a specific network interface
You can control the network address to which the embedded server binds using server.address.
server.address=127.0.0.1
server.port=8080
Binding to 127.0.0.1 can be useful when Nginx, Apache, HAProxy or another local reverse proxy is the only service that should communicate directly with Spring Boot.
Do not blindly change the address to 0.0.0.0 without understanding your deployment environment. It makes the application listen on all available interfaces, which may expose the service beyond what you intended.
Enabling GZip compression in Spring Boot
HTTP response compression reduces the amount of data transferred between your application and its clients. It is particularly effective for text formats such as HTML, CSS, JavaScript, XML and JSON.
Response compression is disabled by default. Enable it with:
# Enable response compression
server.compression.enabled=true

# The comma-separated list of mime types that should be compressed
server.compression.mime-types=text/html,text/xml,text/plain,text/css,text/javascript,application/javascript,application/json

# Compress the response only if the response size is at least 1KB
server.compression.min-response-size=1024
Modern Spring Boot already has a sensible default list of compressible MIME types, including HTML, XML, plain text, CSS, JavaScript and JSON. Therefore the minimal configuration may simply be:
server.compression.enabled=trueThe default minimum response size in current Spring Boot releases is 2 KB. You can override it explicitly:
server.compression.enabled=true
server.compression.min-response-size=2KB
Compression has CPU overhead, which is why compressing tiny responses often provides little benefit. Images, ZIP archives, video and many other binary formats are already compressed and normally should not be passed through another compression layer.
Adding MIME types to compression
If your application serves another text-based format, you can extend the configured MIME types. Newer Spring Boot versions also expose an additional MIME-types setting, allowing you to extend rather than redefine the defaults.
server.compression.enabled=true
server.compression.additional-mime-types=application/problem+json,application/ld+json
Before tuning compression inside Spring Boot, also check whether your reverse proxy, CDN or ingress controller already performs compression. Duplicating responsibility across multiple layers makes troubleshooting harder.
Enabling HTTP/2 in Spring Boot
HTTP/2 improves HTTP connection efficiency by allowing multiple request and response streams to share a connection. It also uses binary framing and header compression.
Enable Spring Boot HTTP/2 support with:
# Enable HTTP/2 support, if the current environment supports it
server.http2.enabled=true
Spring Boot supports both HTTP/2 over TLS (h2) and clear-text HTTP/2 (h2c) where the chosen embedded server supports it.
For normal public websites, HTTP/2 is usually delivered over HTTPS. If TLS terminates at a reverse proxy or load balancer, the connection from that proxy to your Spring Boot application may instead use HTTP/1.1 or h2c depending on your infrastructure.
Do not confuse HTTP/2 with application speed. Enabling HTTP/2 can improve connection efficiency, but it will not fix slow database queries, inefficient APIs, thread starvation or poor application architecture.
Configuring HTTPS and TLS
If Spring Boot terminates HTTPS itself rather than sitting behind a TLS-terminating proxy, configure an SSL certificate for the embedded server.
A traditional PKCS12 configuration looks like:
server.port=8443
server.ssl.enabled=true
server.ssl.key-store=classpath:application.p12
server.ssl.key-store-password=${SSL_KEYSTORE_PASSWORD}
server.ssl.key-store-type=PKCS12
Keeping secrets such as the keystore password in an environment variable or external secret store is preferable to committing them to source control.
Using SSL bundles
Modern Spring Boot also supports reusable SSL bundles. For example:
spring.ssl.bundle.jks.web.keystore.location=classpath:application.p12
spring.ssl.bundle.jks.web.keystore.password=${SSL_KEYSTORE_PASSWORD}
spring.ssl.bundle.jks.web.keystore.type=PKCS12

server.port=8443
server.ssl.bundle=web
SSL bundles are useful when the same trust material needs to be configured consistently across servers and clients.
Spring Boot can also use PEM certificate and private-key files directly:
spring.ssl.bundle.pem.web.keystore.certificate=file:/etc/ssl/example/fullchain.pem
spring.ssl.bundle.pem.web.keystore.private-key=file:/etc/ssl/example/private-key.pem
server.ssl.bundle=web
Current Spring Boot versions can reload compatible SSL bundles when certificate files change, which is useful when certificates are renewed externally.
Configuring browser caching for static resources
HTTP compression saves bandwidth during a request. Browser caching can avoid the request entirely.
Cache-Control headers tell browsers and intermediary caches how a resource may be reused.
Current Spring Boot cache configuration
Modern Spring Boot uses the spring.web.resources namespace:
# Maximum time the response should be cached
spring.web.resources.cache.cachecontrol.max-age=120s

# Revalidate a stale resource before using it
spring.web.resources.cache.cachecontrol.must-revalidate=true
For publicly cacheable static resources:
spring.web.resources.cache.cachecontrol.max-age=365d
spring.web.resources.cache.cachecontrol.cache-public=true
A long cache lifetime such as one year should normally be used only when filenames are versioned or fingerprinted. Otherwise, a browser may continue serving an old CSS or JavaScript file after you deploy a new version.
Older Spring Boot syntax
Older versions of this tutorial used:
# Maximum time the response should be cached (in seconds)
spring.resources.cache.cachecontrol.max-age=120
# The cache must re-validate stale resources with the server. Any expired resources must not be used without re-validating.
spring.resources.cache.cachecontrol.must-revalidate=true
And:
# The resources are private and intended for a single user. They must not be stored by a shared cache (e.g CDN).
spring.resources.cache.cachecontrol.cache-private= # set a boolean value true/false
# The resources are public and any cache may store the response.
spring.resources.cache.cachecontrol.cache-public= # set a boolean value true/false
Do not copy these old
spring.resources.*properties into a modern Spring Boot application. Usespring.web.resources.*instead.
Useful Cache-Control options
Spring Boot exposes considerably more than just max-age. Depending on your application, useful directives include:
cache-public— allows shared caches such as a CDN to store the response.cache-private— indicates that the response is intended for a private cache such as the user’s browser.no-cache— permits storage but requires validation before reuse.no-store— instructs caches not to store the response.must-revalidate— prevents stale content from being reused without validation.s-max-age— controls freshness specifically for shared caches.stale-while-revalidate— permits stale content to be served temporarily while it is refreshed.stale-if-error— allows stale content to be served temporarily when an upstream error occurs.
For example:
spring.web.resources.cache.cachecontrol.max-age=1h
spring.web.resources.cache.cachecontrol.cache-public=true
spring.web.resources.cache.cachecontrol.stale-while-revalidate=60s
Static resource locations
Spring Boot automatically serves static content from conventional classpath locations such as /static, /public, /resources and /META-INF/resources.
You can customize resource locations when necessary:
spring.web.resources.static-locations=classpath:/static/,file:/opt/myapp/assets/Be careful when serving arbitrary filesystem directories. Static resource configuration is part of your application’s security boundary.
Configuring multipart file uploads
Multipart handling allows controllers to receive uploaded files through multipart/form-data requests.
Multipart support is enabled with:
spring.servlet.multipart.enabled=trueThe original configuration example is:
# Write files to disk if the file size is more than 2KB.
spring.servlet.multipart.file-size-threshold=2KB
# The intermediate disk location where the uploaded files are written
spring.servlet.multipart.location=/tmp
# Maximum file size that can be uploaded
spring.servlet.multipart.max-file-size=50MB
# Maximum allowed multipart request size
spring.servlet.multipart.max-request-size=75MB
max-file-size limits an individual uploaded file, while max-request-size limits the complete multipart request. A request containing several files can therefore exceed the request limit even if every individual file is below the per-file limit.
Do not set upload limits to extremely large values simply to make an upload error disappear. Upload limits help protect the application from accidental resource exhaustion and abusive requests.
Remember the reverse proxy upload limit
If your Spring Boot application runs behind Nginx, Apache, a cloud load balancer, Kubernetes ingress or another proxy, that layer may impose its own request-body limit.
Increasing spring.servlet.multipart.max-file-size will not help if the proxy rejects the request before it reaches Spring Boot.
Setting HTTP request header limits
Spring Boot exposes a general limit for HTTP request headers:
server.max-http-request-header-size=16KBCurrent Spring Boot releases default to a smaller limit, so increase this only if your application has a legitimate reason, such as unusually large authentication or tracing headers.
Oversized headers are often a symptom rather than something that should automatically be accommodated. Large cookies in particular can create unnecessary bandwidth on every request.
Configuring Tomcat-specific settings
Spring Boot exposes common server settings through the server.* namespace and container-specific settings through namespaces such as server.tomcat.*.
Examples include:
# Maximum form POST size
server.tomcat.max-http-form-post-size=2MB
# Maximum number of keep-alive requests
server.tomcat.max-keep-alive-requests=100
# Maximum number of request parameters parsed by Tomcat
server.tomcat.max-parameter-count=1000
There are also server-specific properties for threads, connections, access logging, response-header limits and other container behavior.
Avoid copying “high performance Tomcat settings” from random production configurations. Raising thread counts, connection limits and queues without load testing can increase memory consumption and latency rather than improve throughput.
Configuring forwarded headers behind a reverse proxy
Production Spring Boot applications commonly run behind a reverse proxy, ingress controller or cloud load balancer.
The proxy may receive a request such as:
https://example.com/accountwhile forwarding it internally to something like:
http://10.0.1.42:8080/accountWithout correct forwarded-header handling, the application may believe the original request used HTTP rather than HTTPS or may generate URLs containing the internal host and port.
Spring Boot exposes:
server.forward-headers-strategy=nativeor, depending on your deployment:
server.forward-headers-strategy=frameworkThe correct choice depends on your server and proxy setup.
Security warning: forwarded headers should only be trusted when your network architecture ensures that untrusted clients cannot spoof them directly. The proxy and application must agree on where the trust boundary is.
Graceful shutdown in Spring Boot
Graceful shutdown allows an application instance to finish existing requests while it is being stopped instead of terminating active traffic immediately.
This is especially important with rolling deployments, container orchestration and load-balanced applications.
In current Spring Boot releases, graceful shutdown is enabled by default for the supported embedded servers.
You can configure how long a shutdown phase may take:
spring.lifecycle.timeout-per-shutdown-phase=20sIf you specifically need immediate shutdown instead:
server.shutdown=immediateFor most production HTTP services, graceful shutdown is the safer default.
Configuring session cookies
Servlet-based applications that use HTTP sessions can configure session lifetime and cookie behavior through server.servlet.session.*.
server.servlet.session.timeout=30m
server.servlet.session.cookie.http-only=true
server.servlet.session.cookie.secure=true
server.servlet.session.cookie.same-site=lax
HttpOnly prevents normal browser JavaScript from reading the cookie. Secure restricts the cookie to HTTPS connections. SameSite influences when cookies are sent in cross-site requests.
The correct SameSite value depends on how authentication, embedded content and cross-origin integrations work in your application, so do not change it without testing those flows.
Hiding or changing the Server response header
Spring Boot exposes the server response header through:
server.server-header=MyApplicationIn many deployments there is little value in advertising implementation details through HTTP headers. The exact headers ultimately seen by clients may also be modified by a reverse proxy or CDN.
Using application.properties vs application.yml
Spring Boot supports both application.properties and YAML configuration.
For example:
server.port=8080
server.compression.enabled=true
server.http2.enabled=true
spring.lifecycle.timeout-per-shutdown-phase=20s
is equivalent to:
server:
  port: 8080
  compression:
    enabled: true
  http2:
    enabled: true
spring:
  lifecycle:
    timeout-per-shutdown-phase: 20s
Neither format is inherently better. Properties files are compact and easy to search; YAML can be easier to read when configuration is deeply nested.
Environment-specific Spring Boot configuration
Development and production environments rarely need identical server settings.
You can use Spring profiles, for example:
application.properties
application-dev.properties
application-prod.properties
Then activate a profile:
spring.profiles.active=prodor externally:
SPRING_PROFILES_ACTIVE=prod java -jar myapp.jarProduction secrets should normally be supplied by environment variables, mounted configuration, a secrets manager or another deployment-specific mechanism instead of being committed to application-prod.properties.
A practical production configuration example
There is no universal “best” Spring Boot configuration, but the following example illustrates how several of the settings discussed above fit together:
# Server
server.port=8080
server.servlet.context-path=/
# Response compression
server.compression.enabled=true
server.compression.min-response-size=2KB
# HTTP/2
server.http2.enabled=true
# Reverse proxy handling
server.forward-headers-strategy=native
# Request protection
server.max-http-request-header-size=16KB
# Static resources
spring.web.resources.cache.cachecontrol.max-age=1h
spring.web.resources.cache.cachecontrol.cache-public=true
# Multipart uploads
spring.servlet.multipart.enabled=true
spring.servlet.multipart.max-file-size=20MB
spring.servlet.multipart.max-request-size=25MB
# Graceful shutdown
spring.lifecycle.timeout-per-shutdown-phase=20s
# Session security - relevant only when using servlet HTTP sessions
server.servlet.session.cookie.http-only=true
server.servlet.session.cookie.secure=true
server.servlet.session.cookie.same-site=lax
Treat this as an example, not a configuration file to copy blindly. Whether a setting is appropriate depends on whether TLS terminates in Spring Boot or at a proxy, whether static assets are served by the application or a CDN, whether the application accepts uploads, whether it uses HTTP sessions and how it is deployed.
Spring Boot server configuration priority
Spring Boot supports externalized configuration, which means a packaged application’s defaults can be overridden without rebuilding it.
In practice, you may encounter configuration coming from:
application.propertiesorapplication.yml- profile-specific configuration
- environment variables
- system properties
- command-line arguments
- deployment-platform configuration
This is useful, but it can also explain mysterious production behavior. If server.port=8080 appears in your repository but the application starts on another port, check whether the property is being overridden externally.
Common Spring Boot server configuration mistakes
1. Copying obsolete Spring Boot properties
Spring Boot’s configuration model evolves. A tutorial written for Spring Boot 1.x or 2.x may contain property names that have since moved or disappeared.
The static-resource change from spring.resources.* to spring.web.resources.* is a good example.
2. Tuning the embedded server before measuring anything
Changing thread pools, queues and connection limits without measurements is not performance engineering. Start with metrics and load testing, find the bottleneck and tune the component responsible for it.
3. Configuring Spring Boot while ignoring the reverse proxy
The effective behavior users experience may be determined by several layers:
Browser
   ↓
CDN
   ↓
Load balancer / reverse proxy
   ↓
Spring Boot embedded server
   ↓
Application
Compression, TLS, maximum body size, caching, HTTP/2 and timeouts may exist at more than one of these layers.
4. Using huge upload and header limits
Request limits exist for a reason. Increase them to a documented business requirement, not to effectively unlimited values.
5. Storing passwords in application.properties
Properties files commonly end up in Git repositories, build artifacts and backups. Use external secrets for database passwords, API credentials and TLS keystore passwords.
6. Setting long browser caching without versioned assets
If app.js is cached for a year and you deploy a different app.js tomorrow, returning visitors can continue running the old version. Long-lived caching works best with fingerprinted filenames such as app.a81f94c.js.
Frequently asked questions
What is the default Spring Boot server port?
The default HTTP port is 8080. Change it with server.port.
Which embedded server does Spring Boot use?
Spring MVC applications normally use embedded Tomcat by default. Jetty can be substituted. Spring WebFlux applications commonly use Reactor Netty.
Does Spring Boot 4 support Undertow?
Not as one of Spring Boot 4’s supported embedded servlet servers. Undertow remains relevant to compatible Spring Boot 3.x applications, but new Spring Boot 4 servlet projects should use Tomcat or Jetty.
Is GZip compression enabled by default in Spring Boot?
No. Response compression is disabled by default. Enable it with server.compression.enabled=true.
What is the default minimum response size for Spring Boot compression?
Current Spring Boot releases use a default minimum response size of 2 KB. Configure it with server.compression.min-response-size.
How do I enable HTTP/2 in Spring Boot?
Set server.http2.enabled=true. The environment and embedded web server must also support the required HTTP/2 mode.
How do I enable browser caching in Spring Boot?
For static resources in modern Spring Boot, configure properties under spring.web.resources.cache.cachecontrol. For example, spring.web.resources.cache.cachecontrol.max-age=1h.
How do I increase the maximum upload size in Spring Boot?
Use spring.servlet.multipart.max-file-size for an individual file and spring.servlet.multipart.max-request-size for the entire multipart request.
Is graceful shutdown enabled in Spring Boot?
Yes, in current Spring Boot releases graceful shutdown is enabled by default for the supported embedded servers. Configure the allowed shutdown phase duration with spring.lifecycle.timeout-per-shutdown-phase.
Should Spring Boot serve static files in production?
It can, and that is perfectly reasonable for many applications. For high-traffic public assets, however, a CDN or reverse proxy can often cache and deliver static resources more efficiently while reducing load on the application.
Spring Boot configuration cheat sheet
# Port
server.port=8080
# Bind address
server.address=127.0.0.1
# Servlet context path
server.servlet.context-path=/myapp
# Compression
server.compression.enabled=true
server.compression.min-response-size=2KB
# HTTP/2
server.http2.enabled=true
# Forwarded headers
server.forward-headers-strategy=native
# Maximum HTTP request header size
server.max-http-request-header-size=16KB
# Static resource caching
spring.web.resources.cache.cachecontrol.max-age=1h
spring.web.resources.cache.cachecontrol.cache-public=true
# Multipart uploads
spring.servlet.multipart.enabled=true
spring.servlet.multipart.max-file-size=50MB
spring.servlet.multipart.max-request-size=75MB
# Graceful shutdown timeout
spring.lifecycle.timeout-per-shutdown-phase=20s
# Session
server.servlet.session.timeout=30m
server.servlet.session.cookie.http-only=true
server.servlet.session.cookie.secure=true
server.servlet.session.cookie.same-site=lax
Conclusion
Spring Boot’s defaults are intentionally good enough to start an application without spending hours configuring its web server. Production deployments still benefit from explicitly reviewing the settings that affect networking, security, performance and resource usage.
The most important settings to understand are usually server.port, server.servlet.context-path, response compression, HTTP/2, TLS, static-resource caching, multipart limits, forwarded headers and graceful shutdown.
Before adding a configuration property from an old tutorial, verify it against the documentation for the Spring Boot version you actually run. Server integrations and property namespaces do change between major releases.
The authoritative reference is the Spring Boot Common Application Properties documentation, which lists the configuration properties exposed by the current release.
More Spring Boot resources